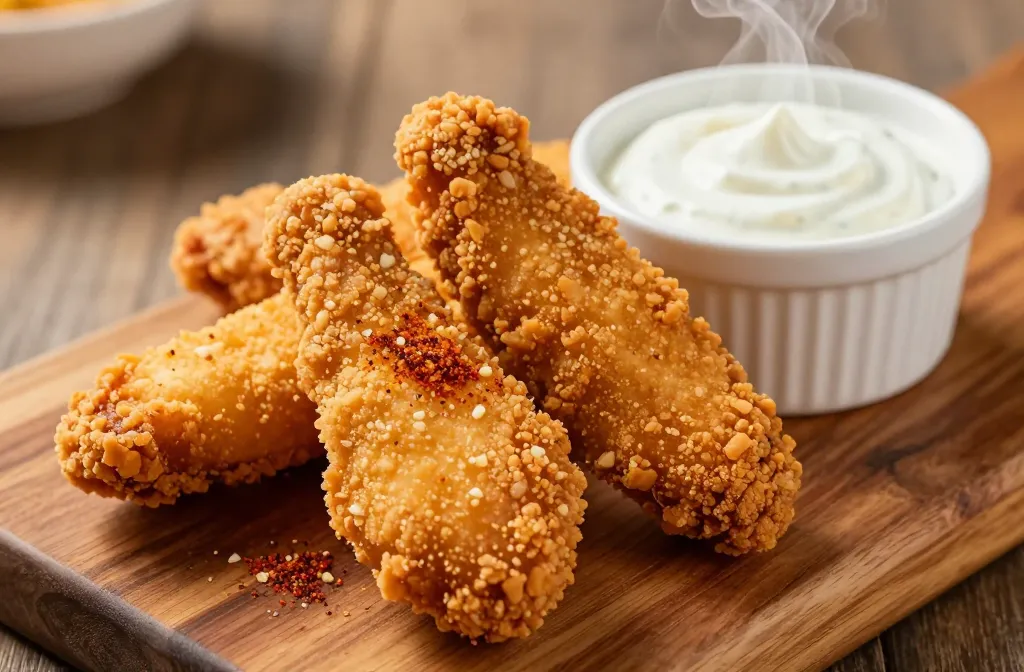
I’m not crying, you’re crying—these gluten free fried chicken tenders are seriously worth shouting about. Crispy, juicy, and totally dairy-free-friendly if you swap a few ingredients, they’re the kind of snack that makes you say “why haven’t I been making this forever?” FYI, you’re about to conquest of texture and flavor.
What makes a crust truly memorable
Before you dip and fry, get the vibe right. The crust should be sturdy, flavorful, and light enough that you still taste chicken, not just batter. Think: a little crunch, a little chew, and zero gluten drama.
– The base: gluten-free flour blends work, but not all blends are created equal. Look for blends with a bit of rice flour, cornstarch, and tapioca for crispness.
– Bind and bond: a touch of beaten egg or dairy-free milk helps the coating cling. If you’re egg-free, flax eggs do the job, but you’ll want slightly more binding power.
– Starch splash: potato starch or corn starch in the mix boosts crunch without heaviness.
– Seasoning party: salt, paprika, garlic powder, onion powder, and a hint of cayenne keep things interesting.
Quick-fire shrimp test? No, chicken, thank you

Gluten-free doesn’t mean bland. Seasoning is where the magic hides, and you don’t need a culinary degree to nail it.
– Dry rub: mix salt, pepper, paprika, garlic powder, onion powder, and a pinch of sugar. This layer goes on the chicken first for flavor that starts inside.
– Wet cosign: a light egg wash or dairy-free milk wash helps the crust stick like glue. Don’t drown the tenders—just a thin coat.
– Rest a sec: let the coated chicken rest 10 minutes. It helps the crust set and reduces tearing when you fry.
Coating tricks for a seriously crispy bite
The crust is where most folks either triumph or crumble. Here are the moves that pay off.
Ingredient swaps
– Flour base: use a gluten-free all-purpose blend plus 1–2 tablespoons of corn starch per cup for extra crisp.
– Add a crumb: breadcrumbs can be gluten-free; mix with the flour for more texture.
– Flavor boosters: grated Parmesan (if you’re not dairy-free) or nutritional yeast for a cheesy, nutty vibe.
The fry setup
– Oil matters: choose peanut or canola oil for high smoke points. They stay crisp without absorbing too much fat.
– Temperature: preheat to 350–375°F (175–190°C). If you don’t have a thermometer, drop a bit of batter—if it sizzles and rises quickly, you’re in business.
– Fry in batches: overcrowding = soggy crust. Give each tender some space to breathe.
Pro tips
– Double-dip for ultimate crunch: dip once in the wet wash, dust in seasoned flour, then dip again and coat once more.
– Chill before fry: refrigerate the coated tenders 15–20 minutes. It helps the crust adhere.
– Drain well: let the finished tenders rest on a rack or paper towels for a minute to shed excess oil.
Sauce, sides, and serving vibes
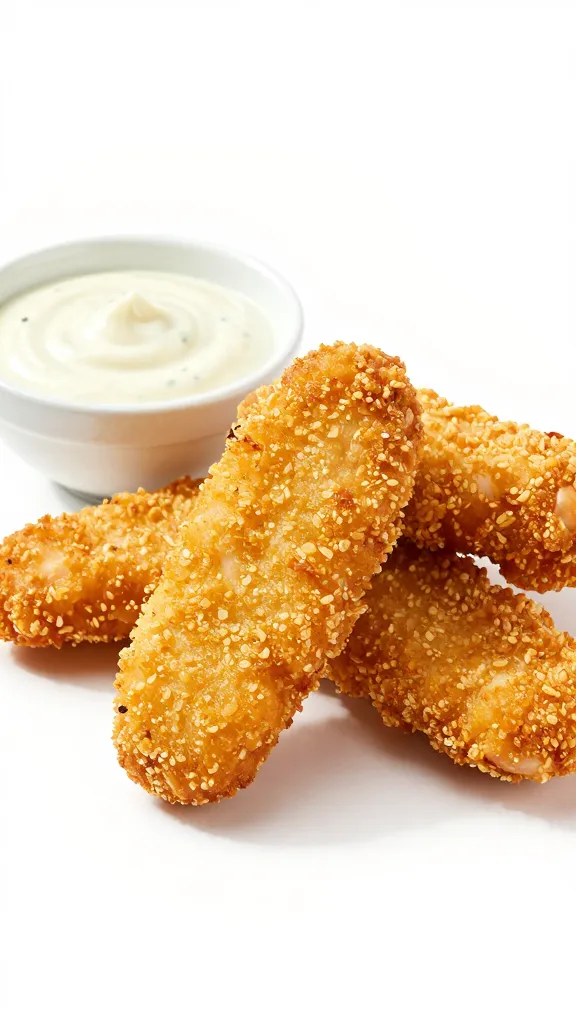
Obviously, you want something to dip these in. Don’t embarrass yourself with bland condiments.
– Classics that work: honey mustard, spicy maple glaze, ranch (check the label for gluten), or a tangy BBQ sauce.
– Dairy-free dip ideas: mayo-based dips with lemon and herbs, or a sriracha mayo made with almond or soy milk.
– Sides that pair: coleslaw, corn on the cob, potato wedges, or a simple green salad to balance the fry weight.
Common mistakes (and how to dodge them)
We’ve all been there, frying a batch that’s more biscuit than bite. Here’s how to keep the ship sailing smoothly.
– Mistake: wet coating is too thick. Fix: shake off excess wet wash and let the coating dry a touch before frying.
– Mistake: oil isn’t hot enough. Fix: heat to 350–375°F and avoid crowding.
– Mistake: under-seasoned chicken. Fix: season generously in the dry rub and in the wash if needed.
– Mistake: soggy after fry. Fix: drain on a rack, not paper towels, for better air circulation.
Variations to spark your kitchen experiments
Everyone loves a remix. Here are a few fun takes to try next.
– Spicy kick: add crushed red pepper flakes or a pinch of cayenne to the dry mix.
– Garlic parmesan crunch: toss with dairy-free grated Parmesan and a touch of garlic powder after frying.
– Herb bomb: fold fresh dill or parsley into your dry mix for a bright finish.
– Crunchy sesame: dust with toasted sesame seeds in the last minute of frying.
Comparison blocks
Gluten-free flour blend vs. single starches
– GF all-purpose blends: great general use, good binding, easy substitution. Easy, but some blends can be heavier.
– Rice flour base: light and crisp, but can taste grainy if overused alone.
– Tapioca/corn starch boost: adds chew and crunch, best used in combination with a flour blend.
Dry rub only vs. double-dip method
– Dry rub only: simpler, quicker, reliable flavor. Might be less crisp.
– Double-dip: yields superior crunch, but takes a few extra minutes. Worth it for special occasions.
Air fryer vs. deep fry
– Air fryer: healthier, less oil, still crispy with the right coat. Time: more precise.
– Deep fry: classic, ultra-crispy crust, fastest crunch. Higher maintenance with oil management.
FAQ
Can I make these ahead? Yes. Coat the tenders, refrigerate up to 24 hours, then fry or bake when ready. If you’re baking, bake at 425°F (220°C) on a wire rack with a sheet tray underneath to catch drips, and flip halfway for even crispiness.
Are these gluten-free tenders dairy-free? They can be. Use a dairy-free milk wash and a dairy-free coating. If you’re not dairy-free, you can use regular milk and a traditional coating.
What’s the best oil for frying? Peanut or canola oil works well due to high smoke points and clean flavor. If you have allergies, choose a neutral oil you’re comfortable with.
How can I tell they’re cooked through? Chicken should reach an internal temperature of 165°F (74°C). Use a meat thermometer in the thickest part to be sure.
Add sections
Pro tips
– Rest the coated chicken on a rack after coating for better air circulation and crisp crust.
– If you’re unsure about gluten-free flours, start with a trusted GF brand that already blends starches and gums for structure.
– If you hate washing a bunch of bowls, pre-measure your dry mix and wet wash in sealed containers you can shake to coat.
Common mistakes
– Not drying the chicken properly before coating leads to soggy crust.
– Skipping rest time allows the crust to crack or peel during frying.
– Frying at inconsistent temperatures yields uneven texture.
Variations
– Spicy glaze: toss cooked tenders in hot sauce and a splash of honey or maple syrup for a quick glaze.
– Herb lemon: finish with lemon zest and chopped thyme for a bright finish.
– Sesame crunch: roll in sesame seeds during the final 2 minutes of frying.
Conclusion
There you have it—gluten free fried chicken tenders that actually taste like fried chicken, not like a health-food experiment. With the right coating, a hot pan of oil, and a couple of smart swaps, you’ll crack the crispy code without gluten. So, are you ready to fry, dip, and demolish a plate of tenders with confidence? IMO, you totally are. Grab your oil, line up your dips, and get ready to impress.