We’re talking crispy, veggie-packed snacks you can make at home without gluten drama. Yes, homemade veggie chips can actually taste like a win, not a wilted cardboard situation. Grab a sheet pan, a mandoline if you’ve got one, and let’s dive in.
Why these homemade veggie chips rock gluten-free snacks
They’re naturally gluten-free, super customizable, and way cheaper than store-bought gluten-free crisps that vanish in a heartbeat. Plus, you control the oil, salt, and seasonings—no mystery preservatives. FYI, you’ll get better texture when you slice thin and dry well before baking. Simple equation: thin + dry = crunch.
What vegetables to use and why

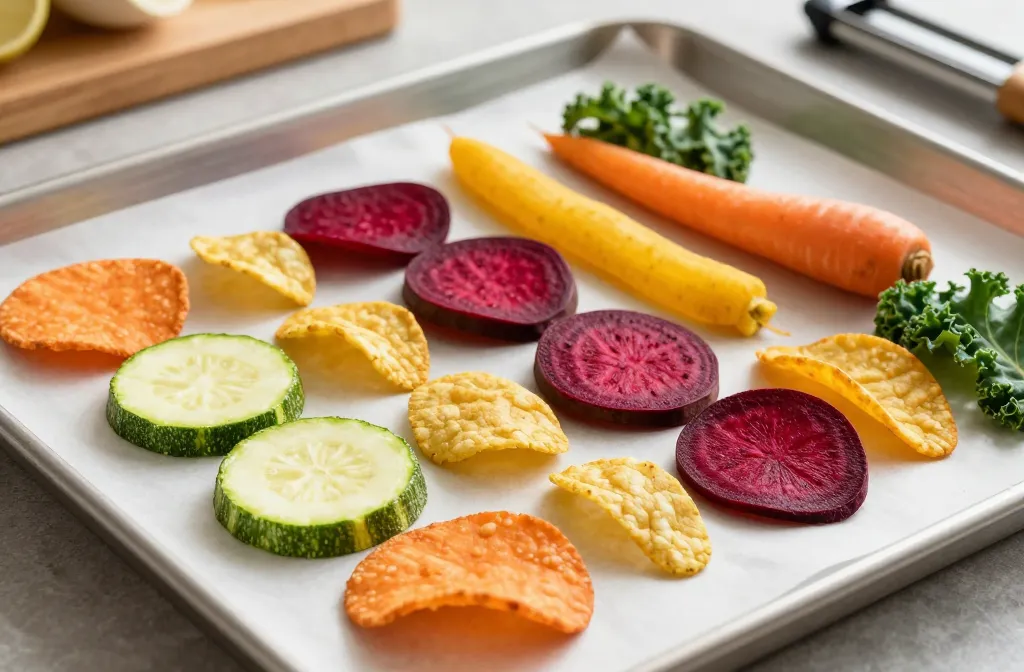
Popular choices: sweet potatoes, zucchini, beets, carrots, kale, parsnips, and thin slices of apple for a surprising sweet-salty twist. Why these work? They dehydrate nicely and crisp up without turning into soggy swamp things. Pro tip: mix a couple of root vegs with a leafy green or two for texture variety.
Tools and prep: the minimal setup that pays off
- Sharp knife or mandoline for consistent thin slices.
- Paper towels or clean kitchen towel to pat dry moisture.
- Large baking sheets and parchment paper for easy cleanup.
- High-heat oven or an air fryer for extra crisp.
If you skip the drying step, you’ll get limp chips. Nobody wants limp chips. IMO, the air fryer makes this feel like cheating in the most delicious way.
Seasoning ideas that actually taste good

You don’t need a long cookbook to get flavor that pops. Start with a simple trio: oil, salt, and a bold spice. Then branch out.
Base formula
- 1–2 tablespoons oil per 2–3 cups of sliced veggies
- 1/2 teaspoon salt per tray (adjust to taste)
- 1/4 teaspoon pepper or paprika for a kick
Flavor ideas to try
- Smoky paprika + garlic powder
- Sea salt + cumin + chili flakes
- Lemon zest + thyme for bright notes
- Sesame oil with sesame seeds and a pinch of chili
Step-by-step: from raw to crunch-ready
Step 1: Preheat and prep. If you’re using the oven, preheat to 225–230°C (425–450°F). High heat helps crisp, just keep a closer eye to prevent burning. If you’re using an air fryer, follow your unit’s temp guidelines, usually around 200°C (400°F).
Step 2: Slice evenly. Aim for 1–2 mm thickness. Thinner slices = crisper. If you’re not sure you’re consistent, use a mandoline or a slicing blade.
Step 3: Dry them. Lay slices on towels, press gently, and pat dry. This removes surface moisture that can steam the chips in the oven.
Step 4: Toss with oil and seasoning. A light coating is plenty. Over-oiling can make them greasy and soggy.
Step 5: Bake or air-fry. In the oven, remove trays to flip halfway and watch closely near the end. In an air fryer, shake the basket halfway through for even crisping.
Step 6: Cool and store. Let them cool on a rack to stay crisp. Store in an airtight container away from humidity for up to a week.
Pro tips, common mistakes, and tweaks

Pro tips
- Patience is a virtue here. Rushing the drying or cooking process leads to soggy chips.
- Keep slices as uniform as possible. If some are thicker, bake longer or remove them earlier so they don’t burn.
- Experiment with sweet and savory blends. A touch of cinnamon on carrot chips is unexpectedly tasty.
Common mistakes
- Too thick slices. They won’t crisp properly.
- Overcrowding the sheet. Steam prevents browning and crunch.
- Ignoring moisture. Wet slices = floppy chips, not crisp ones.
Variations
- Sweet potato + cinnamon and sea salt for a snacky-sweet bite.
- Beet chips with a splash of balsamic and black pepper for color and zing.
- Kale chips with a whisper of olive oil and nutritional yeast for a cheesy vibe (gluten-free, naturally).
- Root veg medley with a touch of smoked paprika for a savory crunch.
Ingredient swaps
- Oil: swap for olive oil or avocado oil. If you want less fat, go light, but expect a touch less crisp.
- Salt: use kosher or sea salt; consider a sprinkle of fine sea salt after baking for punch.
- Seasonings: sub in garlic powder for onion powder; try chili lime for a zesty version.
FAQ
Q: Can I make these gluten-free chips without oil?
A: Oil helps with crispness and flavor, but you can try a light spray of oil or use a minimal amount of oil-free cooking spray. They won’t be as crispy, but they’ll still be tasty.
Q: How long do they stay crispy?
A: About a week in an airtight container at room temperature. Keep them away from humidity—mold is not a fan of gluten-free crunchies.
Q: Are these better with an air fryer or oven?
A: Both work. Air fryers give an extra-crispy finish with less time, while the oven can handle bigger batches and a deeper cornucopia of veggies.
Flavor-packed combinations you can actually finish
Short answer: yes, you can taste-test while you cook. Try pairing flavors with your favorites. If you’re a salty-sweet person, go for sweet potato with a drizzle of maple and pinch of salt. If you love heat, paprika, chili, and a squeeze of lime do wonders on beet or carrot chips. FYI, your friends will want in on your snack “recipe lab.”
Storage and serving ideas
Store in an airtight container away from light and humidity for up to a week. Serve with:
- Guacamole or salsa for dipping
- Hummus or yogurt dip for tang
- As a crunchy topper for salads or soups
Conclusion
Homemade crispy veggie chips are the gluten-free snack you didn’t know you needed, until you tasted them. They’re cheap, flexible, and endlessly customizable. So yes, you can snack healthier without sacrificing crunch or flavor. Give it a go, then brag a little about your kitchen wizardry—you’ve earned it.