Gluten-free can feel like you’re paying extra just to eat the same foods you love—minus the gluten. I get it: you want flavor, texture, and variety without breaking the bank or losing your mind every time you stroll down the gluten-free aisle. So I dug in and tested recipes that prove you don’t need a secret stash of premium flours to eat well. These 5 budget-friendly recipes are not only delicious, they’re practical, crowd-pleasing, and—bonus—easy on your wallet.
Think about the last gluten-free shopping trip where you left the store with a lighter bag but a heavier bill. It feels like magic until you realize the same staples you already own can carry you through weeknight dinners and weekend brunches. I want to show you how to build flavor without splurging on specialty ingredients. FYI, you’ll see how simple pantry swaps, texture tricks, and smart substitutions transform ordinary meals into crave-worthy bites. Ready to save money and still savor every bite? Let’s dive in.
Below you’ll find five bold, personality-packed recipes. Each one is designed to be approachable, repeatable, and satisfyingly delicious. And yes, they’re all gluten-free, budget-conscious, and totally crave-worthy. Trust me, you’ll want to bookmark these and come back for seconds—and maybe thirds.
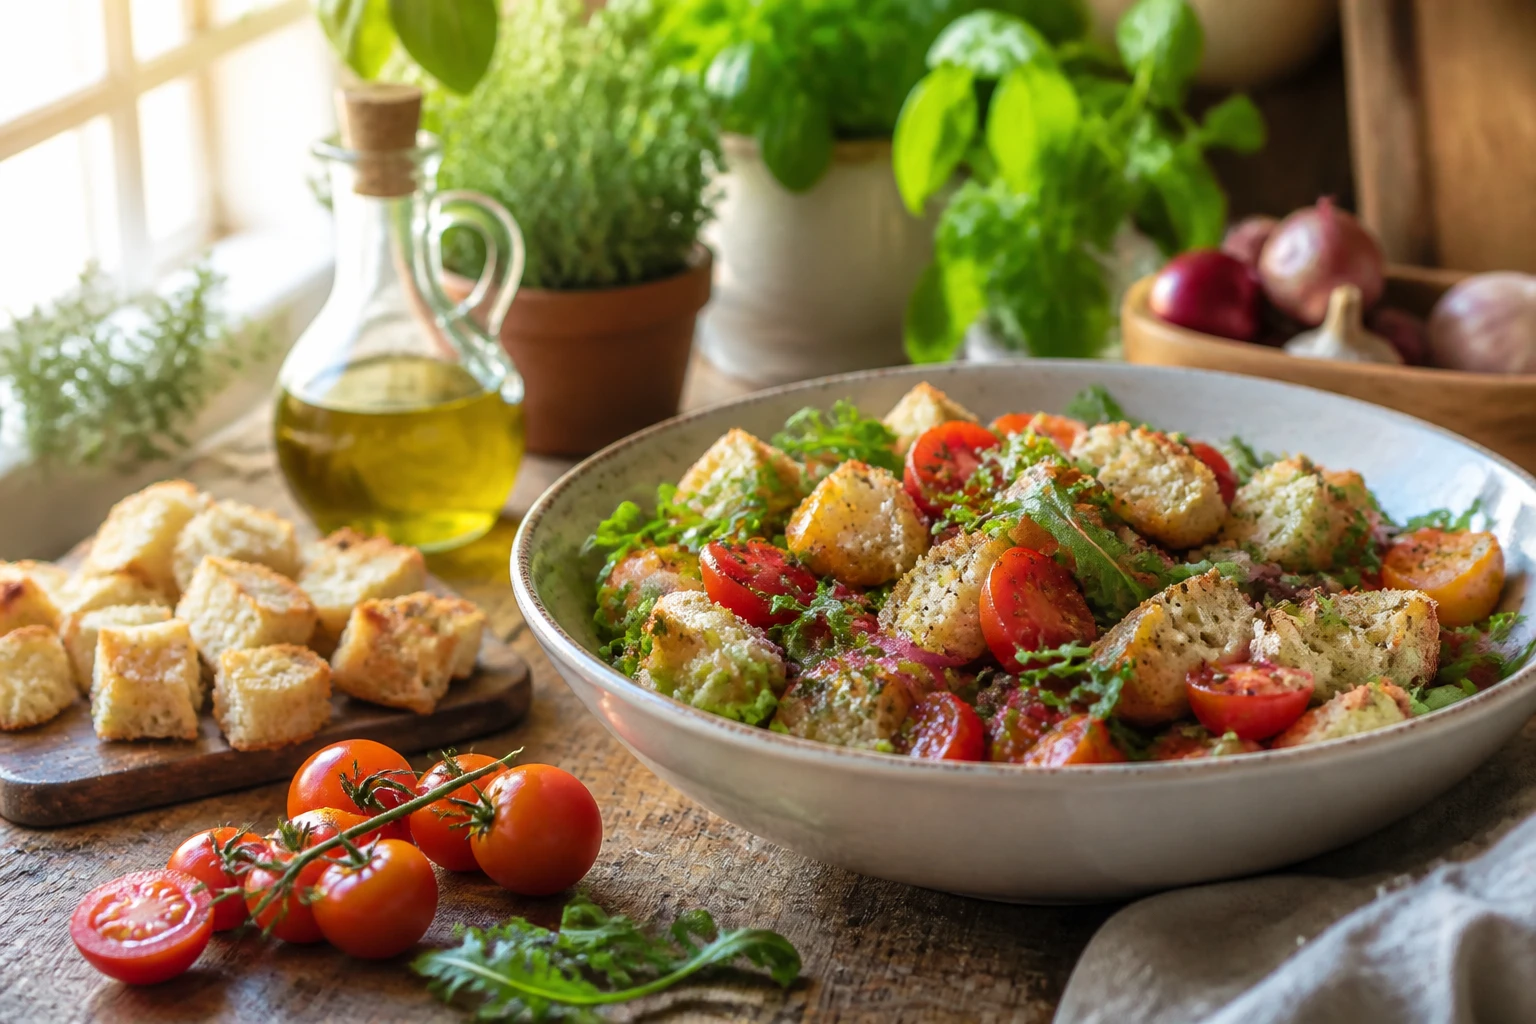
1. Tuscan Panzanella That’ll Ruin Store-Bought Salads Forever
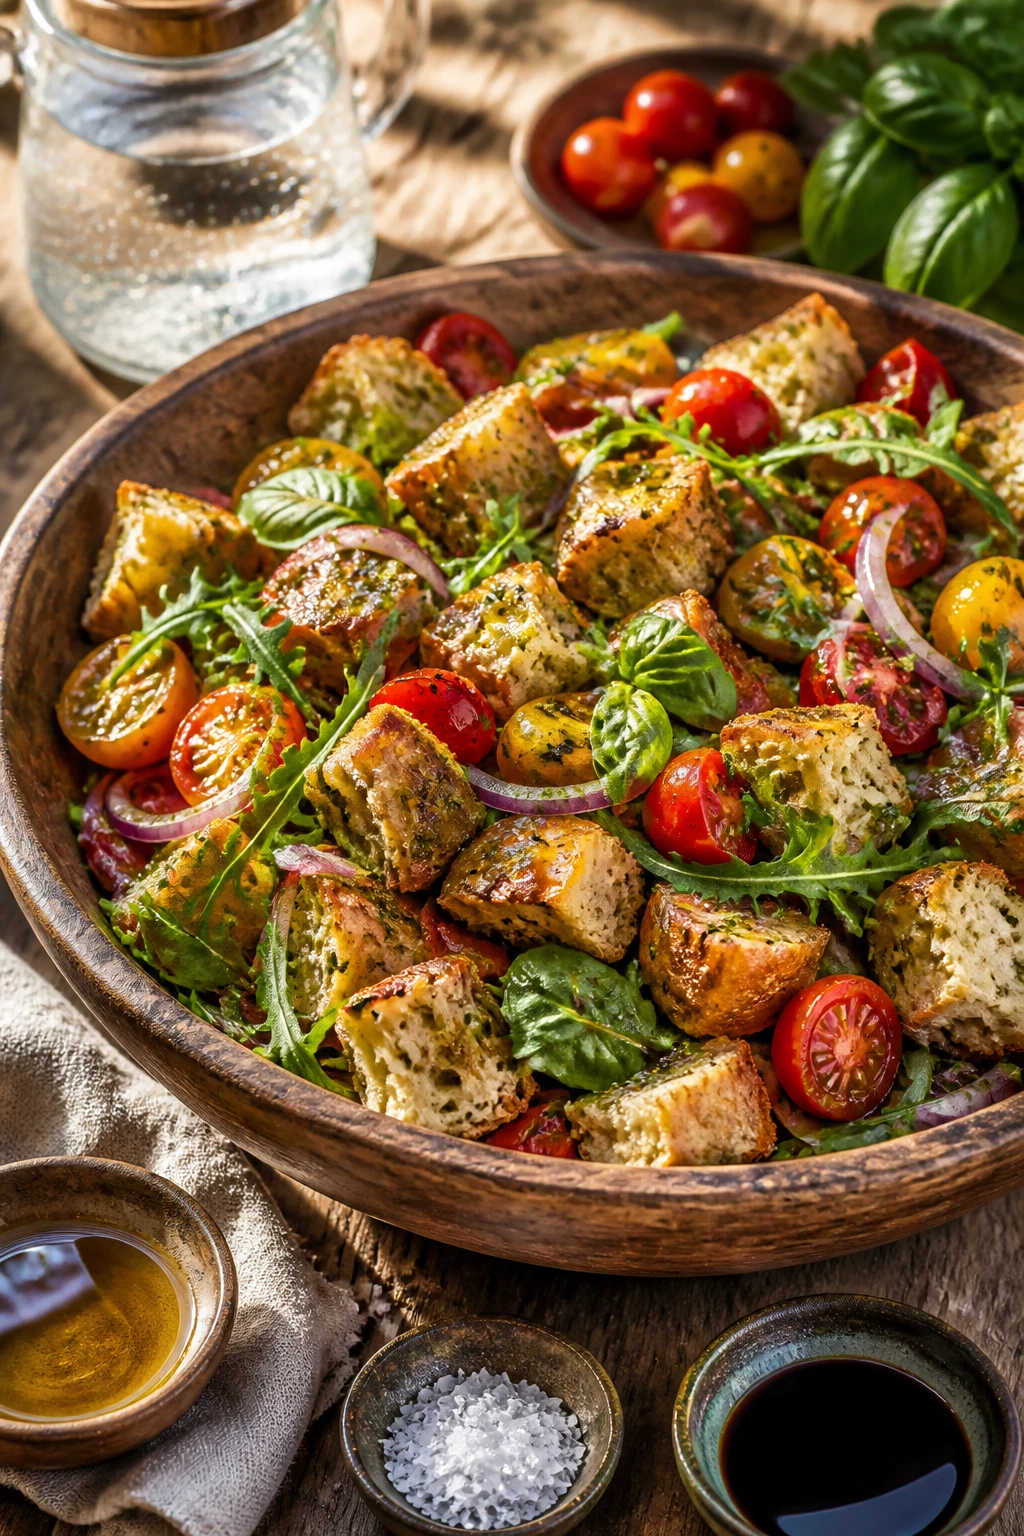
Imagine crunchy, sun-warmed bread cubes mingling with juicy tomatoes, peppery arugula, and a snappy, zippy dressing. This panzanella is not just a salad; it’s a memory of summer in a bowl. The bread absorbs just enough dressing to stay tender but still keeps its chew, giving you texture that makes you keep stabbing your fork for the next bite. It’s the kind of dish you crave on weeknights and then bring to potlucks with a smug grin.
Why You’ll Love It
- Uses day-old gluten-free bread to reduce waste
- Bright, herby dressing that pops without overpowering
- Great make-ahead option for meal prep
- Vibrant color and texture that reads celebratory
- Budget-friendly kitchen staple swap—no pricey ingredients
- Vegetarian-friendly and easily scalable
Ingredients
- 4 cups cubed day-old gluten-free bread
- 2 cups cherry tomatoes, halved
- 1 cucumber, diced
- 1/2 red onion, thinly sliced
- 1/2 cup fresh basil leaves, torn
- 3 tbsp extra-virgin olive oil
- 2 tbsp red wine vinegar
- 1 tsp Dijon mustard
- 1 garlic clove, minced
- Salt and black pepper to taste
- Optional: 1/4 cup pitted olives, chopped
Instructions
- Toast gluten-free bread cubes in a dry skillet until golden and slightly crisp. Set aside to cool.
- In a large bowl, whisk olive oil, red wine vinegar, Dijon mustard, garlic, salt, and pepper to create a bright dressing.
- Add tomatoes, cucumber, red onion, olives (if using), and torn basil to the bowl.
- Gently fold in the toasted bread cubes, allowing them to soak up some dressing without turning mushy.
- Let the salad rest for 10-15 minutes so flavors meld and bread rehydrates just enough.
- Taste and adjust seasoning with more salt, pepper, or a splash of vinegar if needed.
Pro Tips: Use bread that’s a day or two old for maximum crusty texture. You can swap olive oil for a lemon-olive oil mix to brighten things up. If you love heat, toss in a pinch of red pepper flakes.
Easy Variations
- Switch in diced mozzarella or feta for a creamier bite.
- Add grilled chicken for a heartier meal.
- Char the vegetables slightly for a smoky edge.
Mistakes To Avoid
- Overdressing—the bread will mask everything else.
- Using bread that’s too fresh, which becomes soggy quickly.
- Overmixing; delicate greens can turn listless.
Serving Ideas
Serve as a stand-alone lunch, or alongside grilled fish for a Mediterranean dinner. It also makes a killer base for a grain bowl—just add quinoa or farro for extra heft.
What Surprised Me Most About This Recipe
The bread acts like a sponge you actually want, absorbing just enough dressing to stay texturally interesting without turning to mush. It’s counterintuitive but delightful.
The Secret Ingredient Nobody Expects
A whisper of Dijon in the dressing adds a surprising brightness that ties all the veggies together.
Why This Recipe Works Better Than Most Versions
I use gluten-free bread that’s a day old and a simple, vibrant dressing. It’s fast, scalable, and the bread-to-vegetable ratio feels exactly right, not bread-forward or sparse.
Reader Favorite Tip
Let the salad sit for a while; the bread soaks up flavor and becomes irresistibly chewy in the best way.
2. One-Pheet Quinoa Veggie Patties With Crispy Edges
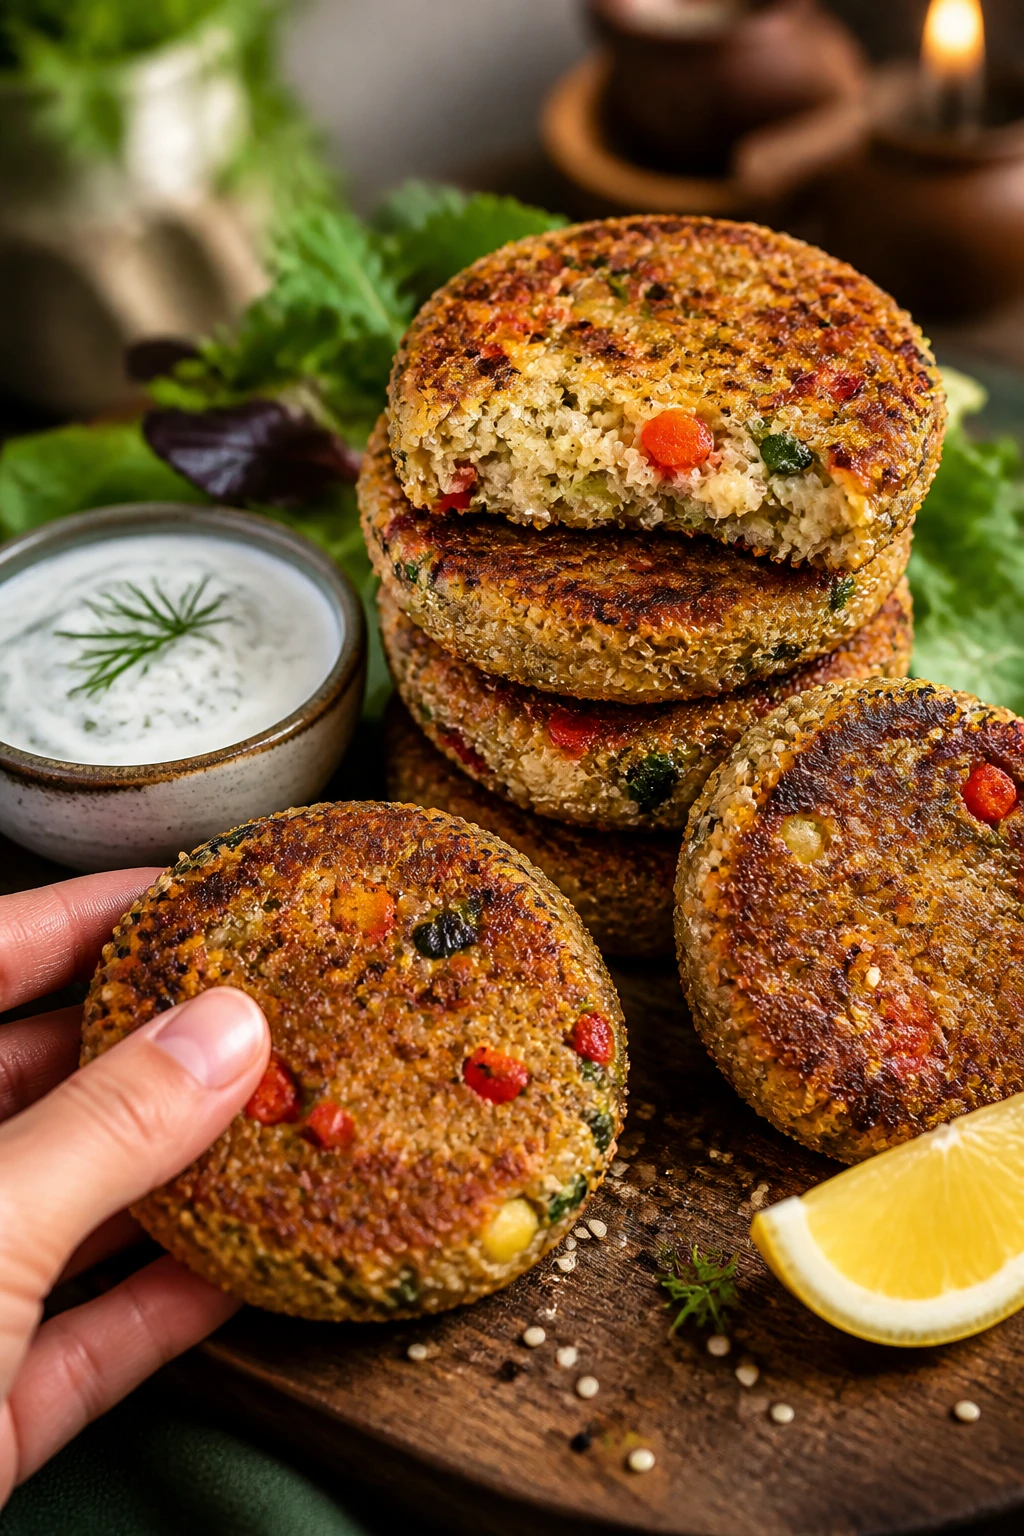
These little veggie patties are the kind of thing you crave on a busy weeknight and still reach for on lazy weekends. They’re sturdy enough to hold up in a sandwich, but tender enough to crumble into a hearty bowl. The quinoa gives a surprisingly light, fluffy interior while the crust delivers a crispy, almost caramelized edge. Seriously, you’ll want to eat these with your hands and pretend you’re a street-food vendor.
Why You’ll Love It
- High-protein gluten-free option that keeps you full
- Crispy crust without deep-frying
- Great for meal prep and quick lunches
- Flexible fillings to suit what’s in your fridge
- Budget-friendly with pantry staples
- Kid-friendly and easy to customize
Ingredients
- 1 cup cooked quinoa (cool)
- 1 cup grated zucchini, squeezed dry
- 1/2 cup finely chopped carrot
- 1/2 cup corn kernels (fresh or frozen)
- 2 green onions, thinly sliced
- 2 eggs, lightly beaten
- 1/2 cup breadcrumbs (gluten-free)
- 2 tbsp chopped fresh parsley
- 1 tsp smoked paprika
- Salt and pepper to taste
- Olive oil for frying
Instructions
- In a large bowl, combine quinoa, zucchini, carrot, corn, and green onions.
- Add eggs, gluten-free breadcrumbs, parsley, paprika, salt, and pepper. Mix until combined and easy to form patties.
- Form patties about 3-4 inches in diameter. If the mixture is too loose, add a tablespoon more breadcrumbs.
- Heat a thin layer of olive oil in a skillet over medium heat. Fry patties 3-4 minutes per side until golden and crisp.
- Transfer to a paper towel-lined plate to drain excess oil. Repeat with remaining patties.
- Keep warm in a low oven while you finish frying the rest.
Pro Tips: If you’re gluten-free, you can swap breadcrumbs for almond flour for a nuttier bite. For extra crunch, press patties gently in breadcrumbs before frying.
Easy Variations
- Add minced garlic and chili flakes for a spicy kick.
- Fold in crumbled feta for a salty tang.
- Replace veggies with shredded sweet potato for a sweeter profile.
Mistakes To Avoid
- Overmixing; you’ll end up with dense patties.
- Using wet zucchini without drying it—moisture prevents crispness.
- Crowding the pan, which steams instead of sears.
Serving Ideas
Slap a patty on gluten-free buns with avocado, tomato, and greens for a friendly burger. Or serve over a fresh salad with lemon-tahini dressing for a lighter lunch.
What Surprised Me Most About This Recipe
The mix holds together even with gluten-free breadcrumbs, proving you don’t need gluten to bind things nicely when you’ve got the right texture balance.
The Secret Ingredient Nobody Expects
A touch of smoked paprika elevates the natural sweetness of the vegetables without overpowering them.
Why This Recipe Works Better Than Most Versions
Quinoa brings staying power and a fluffy interior; the crispy crust delivers satisfaction without deep-frying, which is a win for weeknights and leftovers.
Reader Favorite Tip
Chill the formed patties for 15-20 minutes before frying to help them hold shape even better.
3. Creamy Coconut Chickpea Curry You Can Make In 20 Minutes
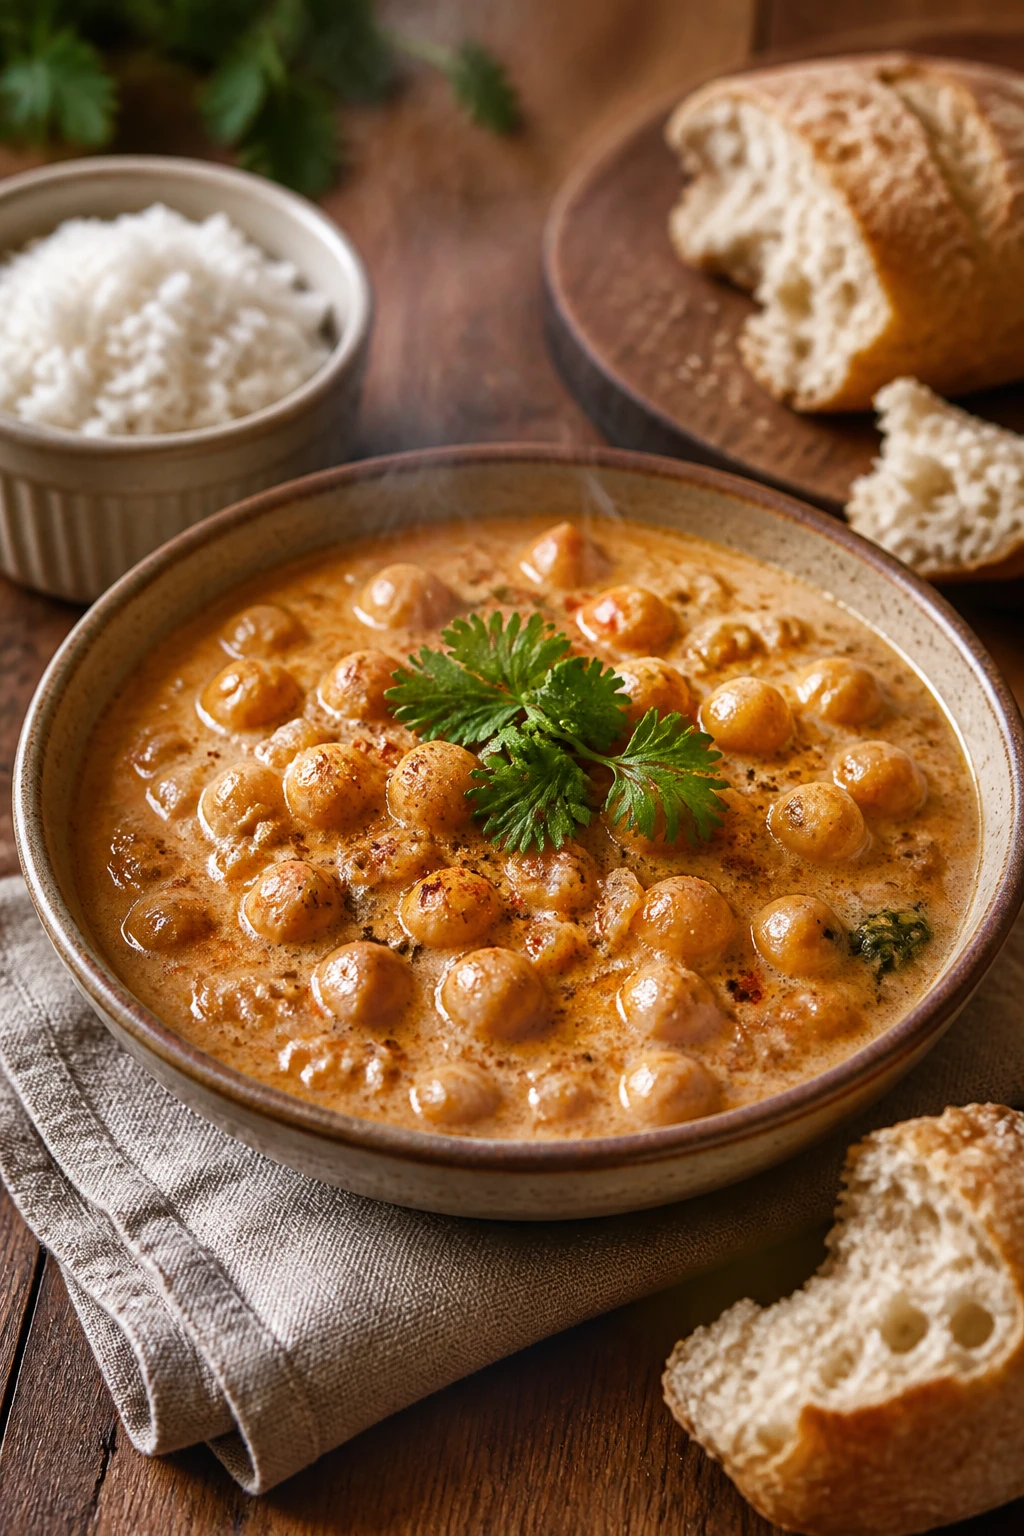
Think cozy bowl meets bright, zippy dinner. The coconut milk lends a silky richness that coats every chickpea, while warming spices bring a hug-in-a-bowl comfort. This one is perfect when you want something comforting but still light on your wallet. It’s the kind of dish that begs you to pair it with steaming rice or a crusty gluten-free bread for sopping up every last drop.
Why You’ll Love It
- Fast weeknight-friendly with pantry staples
- Creamy texture without dairy heavy cream
- Humane portion size for leftovers
- Fragrant, comforting spices that aren’t spicy-hot
- One-pot wonder with easy clean-up
- Budget-friendly protein thanks to chickpeas
Ingredients
- 1 tablespoon oil
- 1 small onion, diced
- 2 garlic cloves, minced
- 1 tablespoon grated fresh ginger
- 1 tablespoon curry powder
- 1 teaspoon ground cumin
- 1 can (14 oz) coconut milk
- 1 can (14 oz) chickpeas, drained and rinsed
- 1 cup diced tomatoes (canned or fresh)
- Salt to taste
- Fresh cilantro for garnish
- Optional: 1 cup spinach or kale
Instructions
- Heat oil in a large skillet over medium heat. Sauté onion until translucent, about 3-4 minutes.
- Add garlic and ginger; cook 1 minute until fragrant.
- Stir in curry powder and cumin; toast for 30 seconds to wake the spices.
- Poure coconut milk, chickpeas, and tomatoes into the pot. Bring to a gentle simmer.
- Season with salt and simmer 8-10 minutes, until flavors meld and sauce thickens slightly. If using greens, add them in the last 2 minutes.
- Finish with cilantro and a squeeze of lime if you have it; serve over rice or with gluten-free bread.
Pro Tips: If you want a brighter finish, add a teaspoon of lime juice at the end. For heartier texture, stir in cooked lentils or sweet potato cubes.
Easy Variations
- Swap chickpeas for lentils for a different bite and protein profile.
- Spice it up with a pinch of chili flakes or a diced jalapeño.
- Use crushed tomatoes for a chunkier sauce, or passata for a smoother finish.
Mistakes To Avoid
- Overcooking the coconut milk into separation; keep it at a gentle simmer.
- Adding acidic tomatoes too early; it can dull the spice aroma.
- Underseasoning; the sauce needs a good hit of salt to sing.
Serving Ideas
Pair with basmati or jasmine rice, or spoon over quinoa for a protein-packed bowl. A side of roasted vegetables also makes the meal feel complete.
What Surprised Me Most About This Recipe
How silky the coconut milk can be without dairy. It makes a rich mouthfeel that you’d expect from a richer sauce, but you can keep it light by balancing with lime and greens.
The Secret Ingredient Nobody Expects
A pinch of black pepper at the end wakes up all the flavors and adds a subtle warmth.
Why This Recipe Works Better Than Most Versions
The base uses pantry staples with flexible add-ins, meaning you can tailor it to what you have without wrecking the flavor profile.
Reader Favorite Tip
Finish with chopped cilantro and a quick squeeze of lime for that “restaurant finish” at home.
4. Herby Lemon-Garlic Salmon With Crunchy Gluten-Free Crust
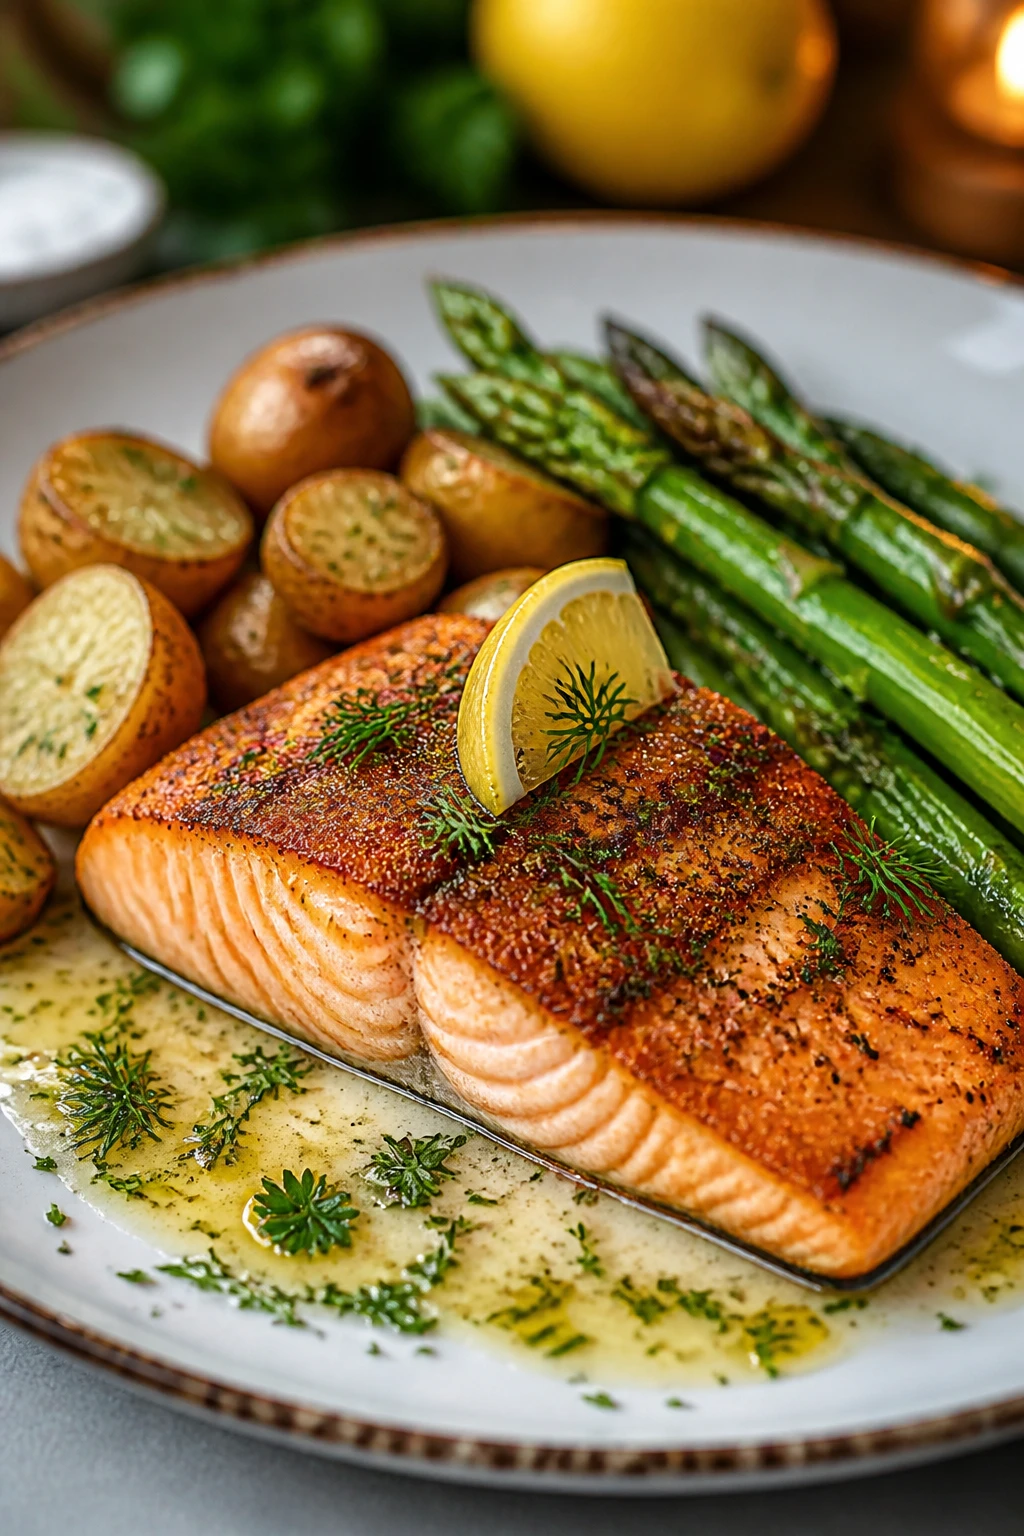
Seafood that feels indulgent but stays budget-friendly? Yes, please. This salmon gets a crust that crackles with every bite, thanks to a few pantry-friendly ingredients, while the herbs brighten the fish with a lemony zing. It’s a versatile centerpiece—great for date night, weeknight dinners, or serving to guests who think gluten-free means bland. Spoiler: it’s anything but bland.
Why You’ll Love It
- Upscaled flavor with minimal effort
- Crunchy crust without deep-frying
- Fast weeknight main that feels special
- Gluten-free and dairy-friendly options
- Elegant enough for guests, simple enough for solo dinners
- Budget-conscious seafood win with salmon being a relatively affordable option
Ingredients
- 2 salmon fillets (6 oz each)
- 2 tbsp almond flour or gluten-free breadcrumbs
- 1 tbsp grated lemon zest
- 2 tbsp chopped fresh parsley
- 1 garlic clove, minced
- 1 tbsp olive oil
- Salt and pepper to taste
- 1 tbsp lemon juice
Instructions
- Preheat oven to 425°F (220°C). Line a baking sheet with parchment.
- Pat salmon dry; brush with olive oil and season with salt and pepper.
- In a small bowl, combine almond flour (or breadcrumbs), lemon zest, parsley, and garlic.
- Press the crust mixture onto the top of each salmon fillet, pressing gently to adhere.
- Bake 10-12 minutes, until salmon is just cooked through and crust is golden and crisp.
- Finish with a squeeze of lemon juice and extra parsley for color.
Pro Tips: If you’re avoiding nuts, use extra breadcrumbs or crushed gluten-free crackers for the crust. For a richer finish, brush a tiny amount of olive oil on top after baking and broil for 1-2 minutes for supreme crunch.
Easy Variations
- Top with capers and lemon slices for a briny pop.
- Add grated Parmesan into the crust for an extra cheesy crust (check dairy-free if needed).
- Switch salmon with cod or tilapia for a lighter, milder flavor.
Mistakes To Avoid
- Overcooking salmon; it should flake but stay moist.
- Under-seasoning the crust; you want a bold crust to contrast with the fish.
- Not patting dry; moisture prevents crust from sticking well.
Serving Ideas
Serve with simple roasted veggies or a bright cucumber-dill salad. A side of herbed quinoa or a lemony polenta works beautifully too.
What Surprised Me Most About This Recipe
That a crust made from almond flour sticks so well to salmon without needing an egg wash. It’s a small trick with a big payoff in texture and crunch.
The Secret Ingredient Nobody Expects
A whisper of lemon zest in the crust brings the citrus aroma directly into every bite, not just the sauce.
Why This Recipe Works Better Than Most Versions
The crust is crisp, but the salmon remains juicy, thanks to a quick bake and careful dryness. It feels like a restaurant plate you can replicate on a weeknight without hassle.
Reader Favorite Tip
Let the crust sit on the fish for about 5 minutes after shaping; it helps it stay intact during baking.
5. Chocolatey Banana Oat Cookies That Taste Like Comfort In a Bite
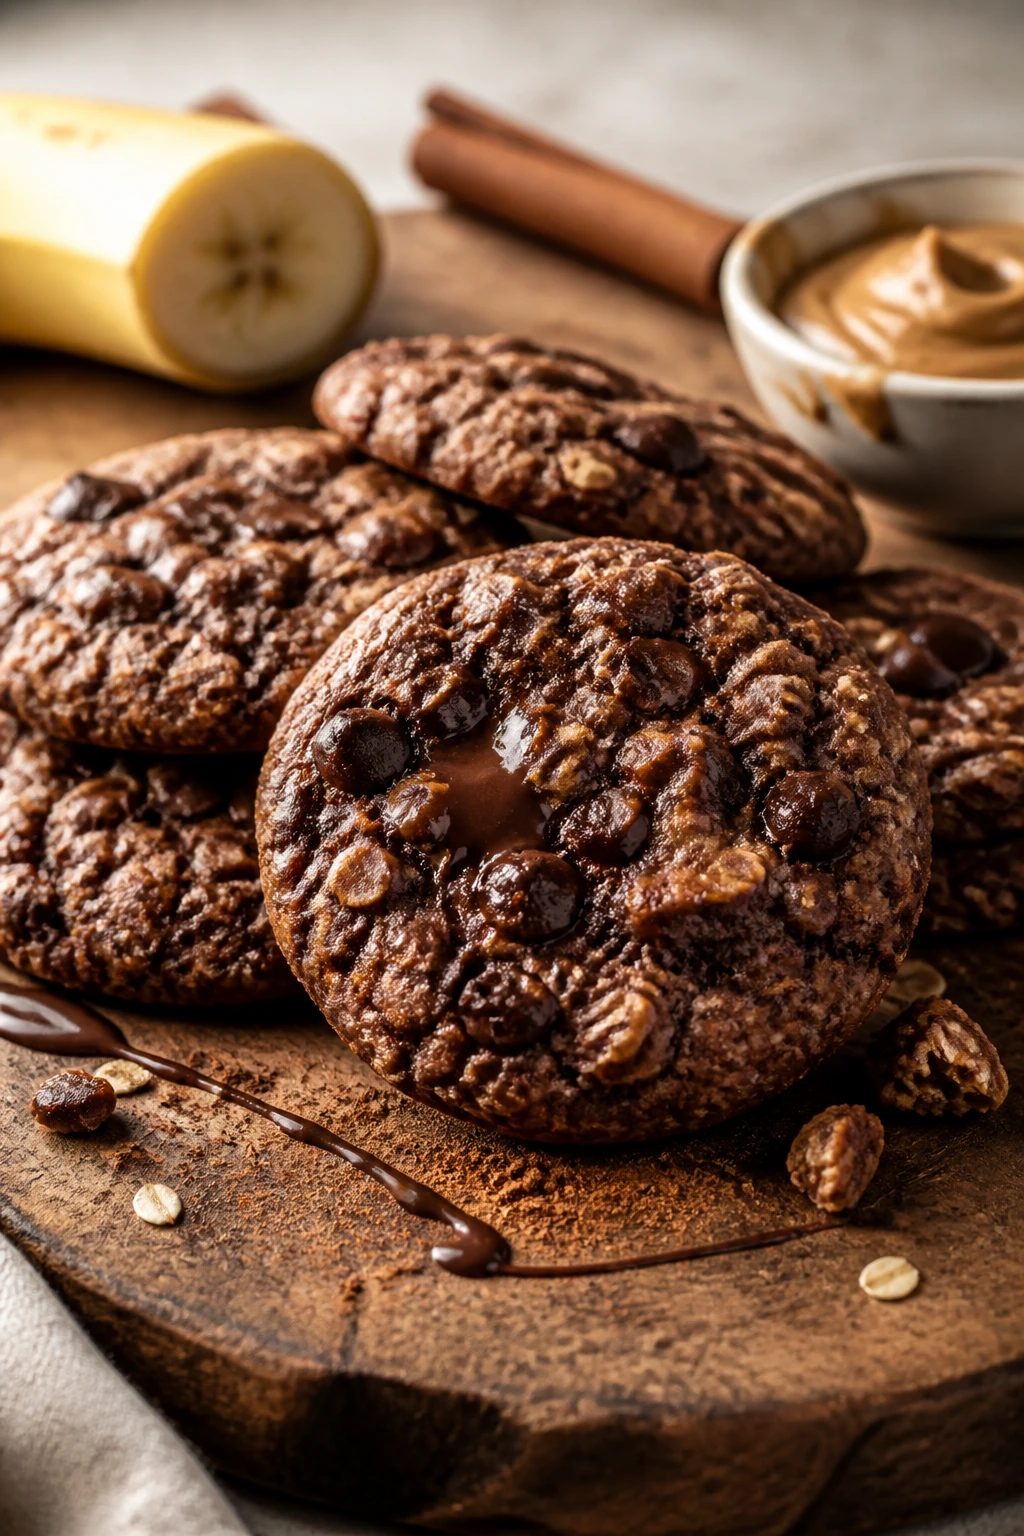
Cookies can be gluten-free and still be chewy, rich, and downright comforting. These chocolatey banana oat cookies deliver that cozy verdict with a soft center, a delicate chew, and a kiss of chocolate in every bite. They’re the kind of treat you reach for when you need dessert that won’t derail your budget or your gluten-free goals. The best part? They come together fast and leave you with the best kind of kitchen chaos—happy, cinnamon-scented chaos.
Why You’ll Love It
- One-bowl wonder with minimal cleanup
- Naturally sweetened with ripe bananas
- Chewy, fudgy texture that rivals bakery cookies
- Great for last-minute cravings
- Simple pantry staples, no special flours required
- Freezer-friendly for easy grab-and-go treats
Ingredients
- 2 ripe bananas, mashed
- 1 cup gluten-free rolled oats
- 1/4 cup cocoa powder
- 1/2 cup chocolate chips
- 1/4 cup peanut butter or almond butter
- 1 tsp vanilla extract
- 1/4 tsp salt
- Optional: 1/4 cup chopped walnuts or pecans
Instructions
- Preheat oven to 350°F (175°C). Line a baking sheet with parchment.
- In a bowl, mix mashed bananas, oats, cocoa powder, peanut butter, vanilla, and salt until a thick batter forms.
- Fold in chocolate chips and nuts if using.
- Drop spoonfuls onto the parchment and flatten slightly.
- Bake 12-14 minutes until set and slightly crackly on top. Let cool on the sheet for 5 minutes before transferring to a rack.
- Store in an airtight container; they stay soft for days or freeze for longer storage.
Pro Tips: If your batter is too wet, add a tablespoon more oats to help bind. For extra chocolatey flavor, swirl in a teaspoon of espresso powder with the cocoa.
Easy Variations
- Swap peanut butter for sun butter for a nut-free version.
- Add 1/4 cup shredded coconut for a tropical twist.
- Stir in white chocolate chips for contrast.
Mistakes To Avoid
- Overbaking; cookies dry out quickly—watch for the just-set moment.
- Using very wet bananas without enough oats to bind.
- Overcrowding the tray; cookies spread and bake unevenly.
Serving Ideas
Serve with a glass of almond milk or a scoop of dairy-free ice cream for a mini dessert. They also double as handy snacks for school or work.
What Surprised Me Most About This Recipe
Banana + cocoa + oats can be both cozy and indulgent without any dairy or refined sugar. It’s a surprisingly elegant trio in a cookie.
The Secret Ingredient Nobody Expects
A pinch of salt in the batter wakes up the chocolate and bananas, making the flavors sing together.
Why This Recipe Works Better Than Most Versions
No flour, no butter, just honest oats and ripe fruit. The cookies stay soft with a gentle chew and a deep chocolate finish that tastes richer than it is.
Reader Favorite Tip
Let the cookies rest on the baking sheet for a few minutes after coming out of the oven—they’ll continue to firm up into perfect, fudgy centers.
Frequently Asked Questions
Q: Are these gluten-free recipes truly budget-friendly?
A: Yes. They rely on pantry staples and affordable ingredients. You’ll often use leftovers and common produce, which keeps costs low without sacrificing flavor.
Q: Can I freeze these recipes?
A: Absolutely. Most freeze well, especially the patties, panzanella, and cookies. Thaw gently or reheat to refresh textures.
Q: Are these kid-friendly?
A: Totally. They’re colorful, flavorful, and easy to customize with toppings or slight spice adjustments.
Q: I have nut allergies. Which recipes are safe?
A: The salmon crust uses nut-free options. For others, swap nut-based ingredients for seeds or extra breadcrumbs where necessary.
Q: What if I don’t have gluten-free bread? Can I use regular bread?
A: If you’re strictly gluten-free, stick to gluten-free bread. For general audience, regular bread can be used in the panzanella but may alter gluten exposure.
Q: How do I store leftovers without staling?
A: Refrigerate in airtight containers and reheat gently to preserve texture. Some dishes like panzanella taste best the next day.
Q: Do these recipes work with dairy-free options?
A: Yes. You can substitute dairy-free butter or skip dairy in most cases. The coconut curry and creamy sauces adapt well.
Q: Can I batch-cook any of these for the week?
A: Absolutely. The patties and curry reheat beautifully and freeze well, making them ideal for weekly meal prep.
Q: What’s the best pantry swap to save money?
A: Use dried herbs over fresh when you don’t need a bright, crisp finish. For the panzanella, stale gluten-free bread is a budget hero; for the cookies, oats are incredibly affordable and versatile.
Final Thoughts
Cooking gluten-free on a budget doesn’t mean compromising on flavor or texture. These five recipes prove you can eat well, feel satisfied, and keep your grocery bill in check. So pick a couple, raid your pantry, and start turning simple ingredients into crave-worthy meals. You’ve got this—your wallet and your taste buds will thank you. Ready to bake, fry, and simmer your way into more gluten-free victories?
Printable Recipe Card
Want just the essential recipe details without scrolling through the article? Get our printable recipe card with just the ingredients and instructions.